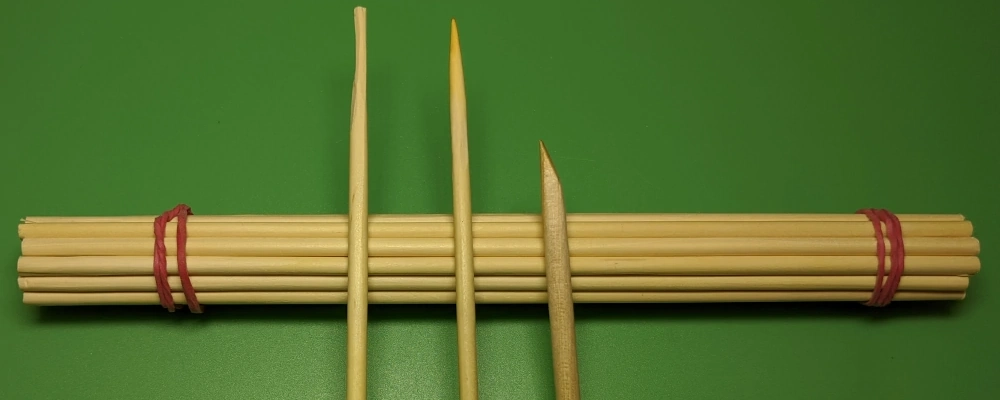
Pegwood looks humble, but it is one of those tools that becomes an extension of your fingers once you know how to use it. Choose good, straight pieces and keep a small knife or chisel nearby to re-point them whenever you need: a freshly sharpened pegwood will clean pivot holes, apply tiny amounts of oil, nudge a wheel into place without scratching, or hold a spring while you manoeuvre other parts. The technique matters — you don’t jab with it like a toothpick; you use the bevelled edge to scrape along a jewel hole, wick away lubricant, or press against a bridge to stabilise it while you secure a screw. Never use pegwood with oils or solvents that saturate it — it’s supposed to be clean and slightly absorbent. Experienced hands will carry several pieces at different points of sharpness: a blunt one for gentle pushes and a needle-fine one for delicate extraction. When pegwood is treated with contempt, it splinters; when it’s treated as sacred, it saves pivots and polish.
Before dismantling anything, check for magnetism — it’s cheap, fast, and embarrassingly effective at solving “mysterious” speed issues. Modern life is peppered with magnets: phone cases, speakers, laptop lids, handbags, and even certain chargers will magnetise a hairspring in a heartbeat. A simple test is to let the watch hang near a small compass (if the needle moves, you’ve a clue), or pass a steel screw near the case to detect unusual attraction; better still, use a
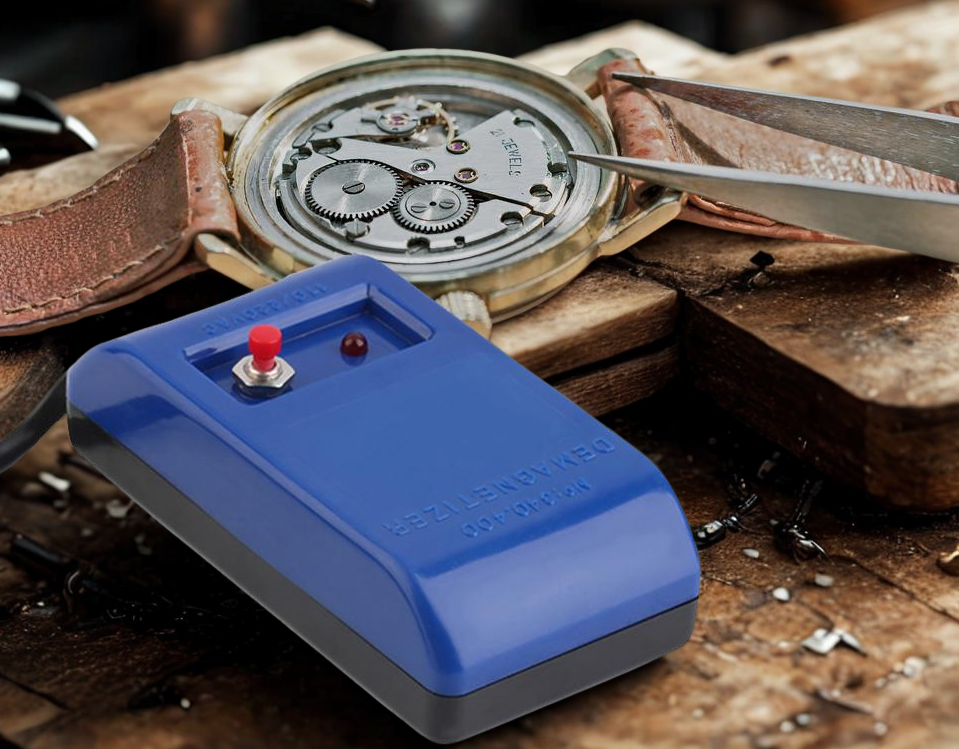
demagnetiser to test and, if necessary, treat the movement. The demagnetiser is not a dramatic tool: short bursts through the field, pulling the part slowly out, is the correct motion — not blasting it full force. Take care not to place magnetic tools near the work when you’re finished, and avoid using a magnet to pick up parts unless you absolutely can isolate and demagnetise them afterwards. Often, you’ll discover that a quick demagnetisation brings a watch back to normal without further interference, and you’ve saved both hands and anxiety.
Always have the right tool for the right job — that sentence sounds obvious until you’ve witnessed a screwdriver with a rounded tip and three new dents on the dial. Invest in a good quality set of screwdrivers with well-machined, hardened tips sized to the watches you most often service. Colour-code the handles or scribe the shaft sizes so you never guess in a moment of impatience. Tweezers deserve equal scrutiny: anti-magnetic, chemically resistant tweezers will keep from staining or magnetising tiny parts. Learn the feel of proper tools; good screwdrivers have a light, tactile engagement with the screw head and give a tiny audible click when seated correctly, letting you apply torque without slippage. Resist cheap, undersized tools; forcing the wrong implement on a screw is how you round heads, crack threads, and create hours of rectification work. When you find a tool that sits perfectly in your hand, it becomes part of your rhythm — and that rhythm prevents mistakes.
Comfort at the loupe is a silent productivity multiplier. Choose a loupe you can wear for hours, not one that cuts into the bridge of your nose or makes your neck ache. Try different styles — the single-eye eyepiece, the double-loupe, headband-mounted magnifiers — and settle on the one that lets you maintain natural posture. As for magnification, 4× to 5× is a popular sweet spot: enough enlargement to see detail without losing the sense of the whole assembly.
Higher magnifications (8× and above) are useful for micro adjustments, but they narrow the depth of field, and you can find yourself lost in one screw while the rest of the movement drifts out of focus. Pair your loupe with consistent lighting — daylight-balanced LED lamps at a low angle help reveal high-relief edges and catch dust without flattening surfaces. Ergonomics is not indulgence; it prevents headaches, neck strain, and sloppy hands.

Rodico is the soft, putty-like miracle people treat like confetti: it picks up fingerprints and dust, holds tiny parts, and can even be used to tamp down a hairspring gently. But the trick is to use it sparingly and with awareness. Pressing too hard will leave residue, and dragging it across a dial will smear oils into the finish. When using Rodico to pick up a screw, press and lift in one confident movement — don’t roll it around like chewing gum. For greasy fingerprints, fold the putty inward after use so you don’t redistribute grime. Keep a small, clean ball on the bench for immediate clean-up and another reserved for delicate dial cleaning, stored in a sealed tin; contamination between uses is how people create problems they think they’ve fixed.
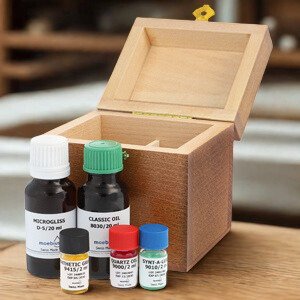
Lubrication is the point where prudence becomes art. The common beginner’s error is to oil the pivot rather than the jewel — apply the oil in the jewel hole and allow capillary action to do the work when the pivot enters. Use an oiler with the correct bore and a steady hand; too-large oilers will spill, and too small ones won’t deposit enough lubricant. Match your oil type to the application: low-viscosity oils for escapement and high-frequency points, heavier greases for keyless works. Keep oils in a tightly capped, temperature-stable environment — contamination and viscosity change are your enemy. And remember: oil does not improve bad geometry — it can only enhance a well-executed pivot. If you see that oil has migrated across an area, clean and reapply correctly; the “more is better” approach is false economy and destroys timekeeping.
Could you photograph your disassembly? Before smartphones, watchmakers sketched; today, a camera roll is your best assistant. Take sequential shots from multiple angles as you remove bridges and components, label the images with brief notes if necessary, and back them up to a folder named for the movement. For complex modules, photograph the dial side and movement side before removal, and take a macro shot of the dial feet, hands, and sensor positions. Use a shallow tray with clearly ordered recesses and place components in the same layout as the photos, so reassembly becomes an act of following your photographic breadcrumbs. When you hit a snag, that line of photos will be worth more than an afternoon spent guessing which screw goes where.
Spring-bars are tiny weapons of mass frustration — and they behave like misbehaving small mammals, flying off with alarming velocity. The plastic-bag trick is beautiful in its simplicity: slip the watch and spring-bar tool inside a clear bag, operate through the plastic, and any liberated spring bar stays in the bag for easy retrieval. If you work on bracelets frequently, keep a jar of replacement bars to hand — many are one-time-use once they deform. Use a forked spring-bar removal tool with a narrow tip for better control, and when replacing them, check for end-link fit and tube wear; replacing an old, brittle bar is cheaper than recovering a watch that has fallen from a wrist.
Static electricity can be your cleaning ally — but wield it carefully. A quick trick is to rub a clean plastic pen across a cloth to charge it, then hover it near a dial and watch as dust follows the field away from delicate indices. Don’t touch the dial with the pen; the attraction should be from a centimetre or so away. Avoid this near sensitive electronic circuits and be mindful of any pacemakers or electronic measurement devices nearby. For very sensitive work, a micro air blower is safer; never blow with your mouth — saliva will wreck a dial’s finish faster than anything but an errant screwdriver.
Over-oiling is the silent killer of watches; it makes motions sticky, moons off into unexpected places, and gathers dust into abrasive globs. The symptom is slowness and erratic walking of the hands; the cure is surgical cleaning and careful reapplication. Always aim for the smallest effective droplet. If you have a timegrapher, watch how the amplitude changes when you apply oil to a pivot — you’ll learn the rough margin between enough and too much. To remove excess oil, pegwood and Rodico are your friends; watchmakers will also use fresh solvent and an ultrasonic bath where appropriate. When servicing a vintage movement, be mindful that old oils can become gummy; re-lubrication after thorough cleaning is non-negotiable.
If something is stuck, consider using controlled heat before resorting to brute force. Friction-fit hands, glued or stubborn bezels, and press-fitted bezels will often respond to a gentle thermal nudge. A purpose-built watchmaker’s heater or even a warm plate will expand metals just enough to ease the fit — don’t blast enamel dials with heat, and keep the temperature safe for lacquer, adhesives, and jewels. Heat is a two-edged sword: too much and you ruin temper on blued steels or melt adhesives. Apply warmth incrementally and test; when the part gives, stop heating. Patience plus heat beats violence.
Pocket watches are underrated teachers. Their larger parts and relatively simple trains make them ideal for learning about escapements, wheels, and screw types without squinting at components like a flea circus. Start with a basic lever-set pocket movement to learn disassembly order, then progress to chronographs and more complicated modules. The skills you refine — pivot handling, jewel cleaning, pallet fork insight — translate well to wristwatch work, but the forgiving scale of a pocket movement means less frantic eyes-on-the-floor searching when something slips. They also force you to learn how to set up a proper staking and staking tools at a scale that feels manageable.
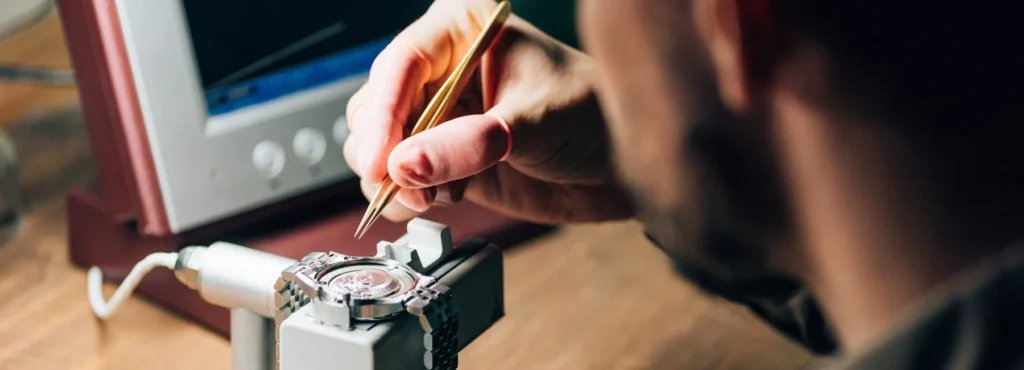
Hands should never be handled by fingers — not because fingerprints are dramatic, but because the oils and acids on skin will, over time, discolour and corrode delicate steel and gilt finishes. Use dedicated hand levers and presses to remove and replace hands; these tools help you apply even pressure and protect the dial. When pressing hands on, make sure they are parallel to the dial; a slight cant will catch on the crystal and mar the finish. If you must handle hands, wear lint-free gloves or use pegwood to nudge them into place. A ruined hand is a small tragedy that often becomes visible only after sale or wear, so treat it with ritual respect.
When dealing with hairsprings, less is more — and brushing is to be avoided. Brushes can catch and distort coils, altering isochronism and making training wheels out of your delicate balance. A gentle puff from a proper air blower dislodges dust without touching the spring; compressed air cans are too powerful and contain propellants that deposit residue, so avoid them. If you must clean a hairspring, consider proper cleaning solutions and ultrasonic methods used in an organised service where springs are mounted and protected. Hairsprings are choreography in metal — you don’t want to step on the dancer’s toes.
Marking your screwdrivers and organising them like a musician tunes an instrument is a habit that saves micro-disasters. Small etched marks, coloured tape, or a drawer system with engraved sizes prevent hasty mistakes where the wrong bit rounds the head. Keep spare tips. When a tip begins to dent, refurbish it with a fine file until it engages the screw fully; if you force a rounded driver, you escalate the damage. Place frequently-used drivers on a vertical rack so you don’t fumble for them mid-operation. The right tool at the right second is how you avoid tiny tragedies that take hours to salvage.

Crystal polishing has a hierarchy, and not every crystal is a candidate. Acrylic crystals polish well with polywatch or even toothpaste for light scuffs; rub gently with a soft cloth in circular motions, then finish with a microfiber to remove haze. Mineral glass is harder and needs cerium oxide and a rotary polisher to remove deep scratches — a risky operation if you value the original geometry. Sapphire is essentially unpolishable for scratches short of replacing the glass. Know what the customer values: original, battle-scarred character versus a showroom-perfect face. For acrylic, the payoff is dramatic; for sapphire, replacement is often the realistic path.
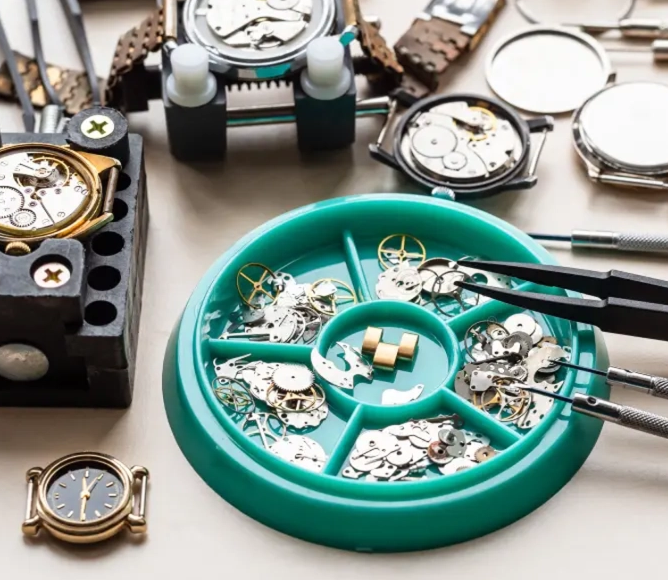
Keep parts in sequence. Use a movement tray, or better yet, a numbered set of recesses that mimic the layout of the calibre. Laying out parts in the exact order and orientation they were removed is more than neatness — it feeds your memory. For complex assemblies, use small labelled containers or pill boxes, and keep screws from the same plane separated. Many watchmakers keep a “first out, last in” rule and sketch a quick map if the layout becomes confusing. When you return to reassembly after a break, those ordered recesses will feel like a story you are reading back in the right order.
When a tiny spring or part does vault into the unknown, don’t become a contortionist chasing it; use the tools of efficiency. A strong handheld magnet (used carefully) can lift escaped steel components from the floor — but first make sure you won’t magnetise the part in so doing. Alternatively, long-handled tweezers and a flashlight held low to the ground can reveal what the eye missed. If you must remove a carpet section, put on a mask and use a soft brush to coax the part to a visible area. Use preventative measures: bench skirts, closed shoes, and a clear habit of working from the centre of the bench outward so parts don’t have a launch vector into the room.
Respect the torque on casebacks, crowns, and screws. Threads in casebacks and crown tubes are small and easy to ruin with excessive force. Use a torque driver where specified for caseback screws and avoid crossing threads when reseating screw-down crowns. If threads are damaged, repair with properly sized inserts or helicoils rather than forcing the wrong fix. For divers and press-fit casebacks, use a calibrated closing press and always re-check water resistance where applicable — a watch sealed poorly is a watch that will drown at the first rain.
You can learn a surprising amount by listening for beat irregularities if you don’t have a TimeGrapher to hand. An uneven “tick — tock — tick — tock” cadence often means the balance is off-centre, the impulse jewel is misaligned, or the hairspring is out of plane. If you tune your ear, you can detect a beat error and make small adjustments to the index or timing screws. The ear won’t replace instruments, but it’s a fast first filter and a reminder that watchmaking is tactile and auditory as much as visual. Train yourself to detect irregularity, then validate and correct with TimeGrapher data.
Practice patience as a deliberate workshop discipline. It’s a cliché to say “take your time,” but hurry ruins finishing, bending, and judgment. Break big jobs into micro-steps, set short breaks, and allow your hands to reset. If you notice you are clenching or sighing with frustration, stop and make an intentional walk away — the body needs a reset. Patience isn’t passive; it’s an active technique of measured breathing, micro-pauses, and deliberate re-evaluation. The watches you service will reward the quiet.
Temperature and humidity are quietly significant. Metals expand and contract even with the modest changes of a bench room, and humidity influences oils and dial finishes. Keep your workspace within a comfortable band, ideally a stable room temperature where lubricants behave predictably and humidity doesn’t cause condensation beneath a crystal. Store oils and solvents in climate-stable cabinets; extremes will change viscosity and shelf life. If you move watches from a cold car into a warm room, wait for equilibrium before opening them — condensation can form on internal bits if you’re impatient, and that’s a nasty corrosion risk.
Know when to stop. This is different from patience: it’s recognising diminishing returns and switching gears. If an adjustment that should take five minutes becomes an hour of tinkering, it’s time to record what you’ve tried, photograph your current state, and step away. Sometimes the best technical decision you make is to sleep on it and return with fresher eyes. This pause often reveals a simple oversight rather than a complex failure. In workshops where time is billable, it’s tempting to chase perfection in one sitting; discipline says document and resume.
Finally, respect originality. Vintage watches are historical objects, and their patina tells stories. Before polishing a case or changing hands, consult the owner and document the original state thoroughly with photos. Many collectors prize untouched, honest surfaces over a forgivable shine. Polishing and restoration have a place, but they should be deliberate choices with consent, not default actions made for aesthetics. When restoration is called for, aim for sympathetic work that preserves proportions and character rather than erasing age.
These tips are practical, but they are only part of the equation — the rest is temperament and attention. Tools, trays, pegwood, and oil do not replace a curious, careful mind. Keep practising small tasks until they feel like second nature: regulating a balance, cleaning a jewel hole, or filing a screw head. The more you encode good habits into your body, the less you must rely on frantic cognitive correction when something slips. If you want, I can expand any single one of these sections into a deeper how-to — with step-by-step photos, mock-ups, a parts checklist, or a printable bench procedure for a specific calibre.
Which tip shall I take apart next and make bench-ready with step-by-step instructions?